How to Create an International Label
Deftship helps you reach more customers and ship internationally (cross-border). Feel free to read through the details below or get in touch with us for more assistance.

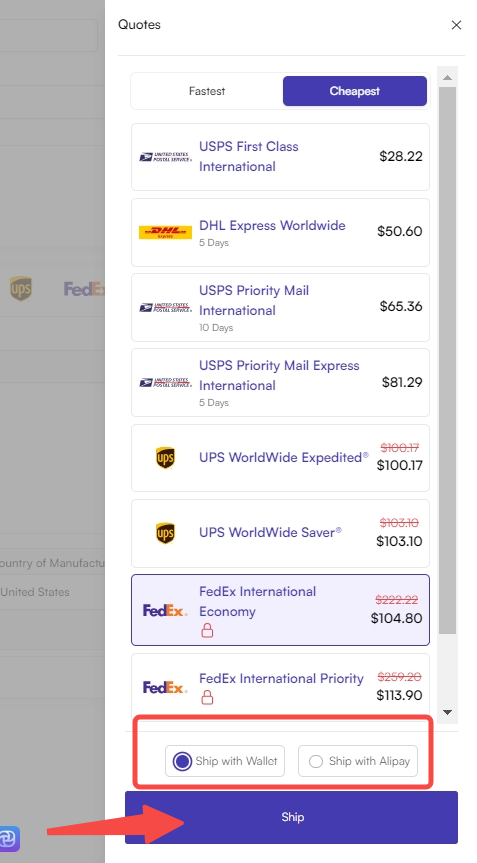

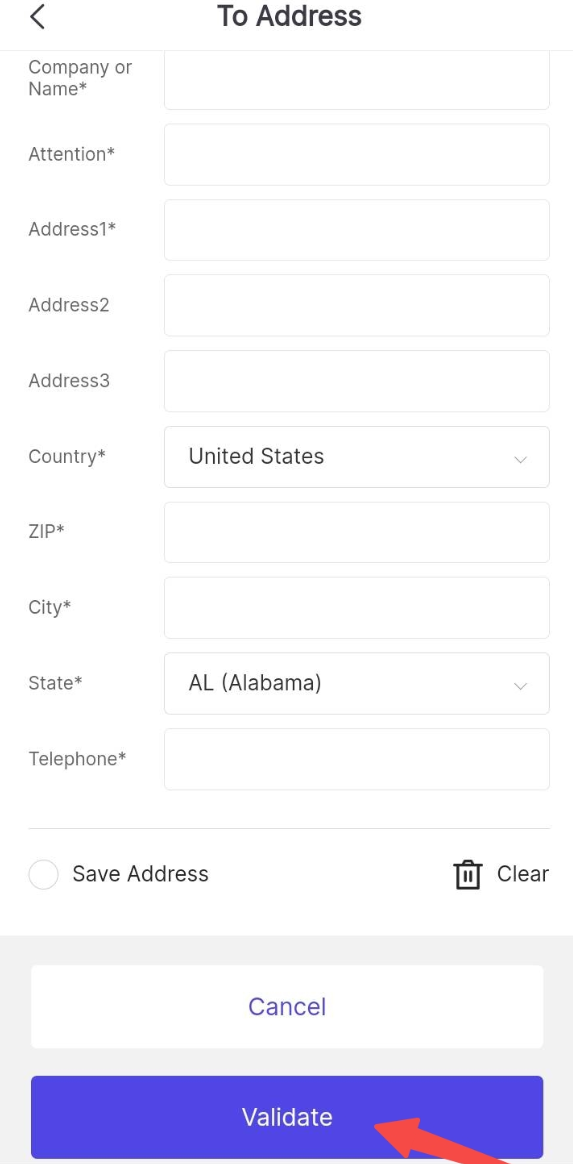
To get started creating an international shipping label, you will first need to enter the sender and recipient addresses.
See references in Adding the sender and recipient addresses.
- Add/Edit Sender's address.
- Add/Edit Recipient's address.
NOTE: Phone numbers are required for international shipments. You can also set the Sender as the Default Return address.
Steps in Creating an International Label from Web
1. Log in to your Deftship account.
2. Click on New Shipment and set the 'Ship To' and 'Ship From' addresses as instructed above.
3. Fill in the order details.
Make sure that the product value/information and description is complete as they are required for International Shipping.
3. Choose your preferred carrier and/or services.
You can also select your preferred services for your chosen Carrier by setting your Preferences.
We also support Paperless Trade invoice. Please see more details here.
In case you are to ship to Canada and wants to know more, feel free to check this article.
4. Once, successfully created then, the label should be available for download under the Shipments tab.
Steps in Creating an International Label from Mobile App
1. Log in to your Deftship Mobile App
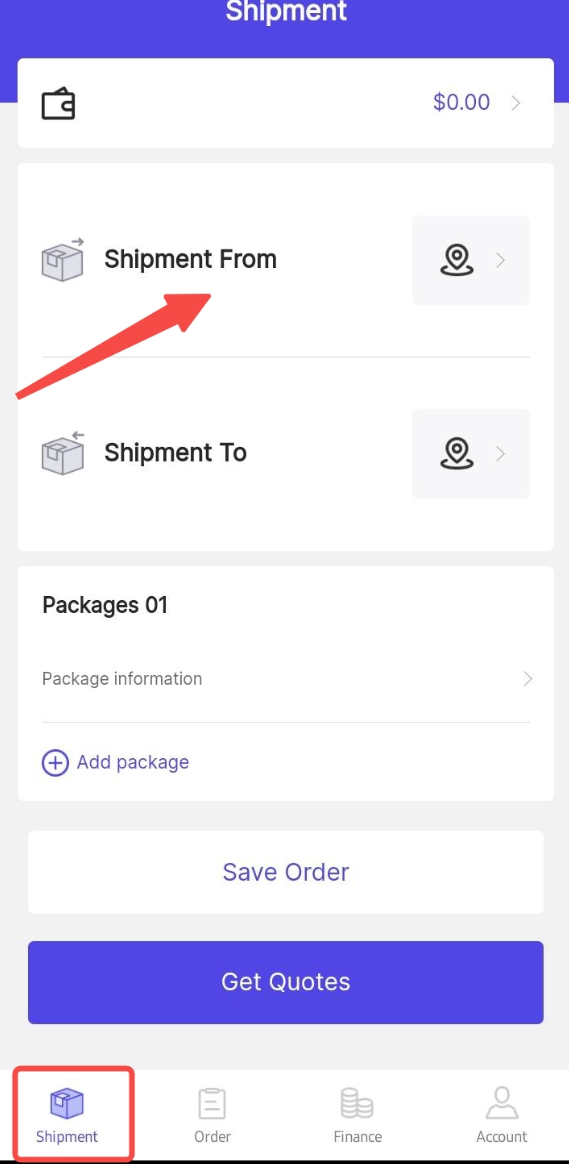
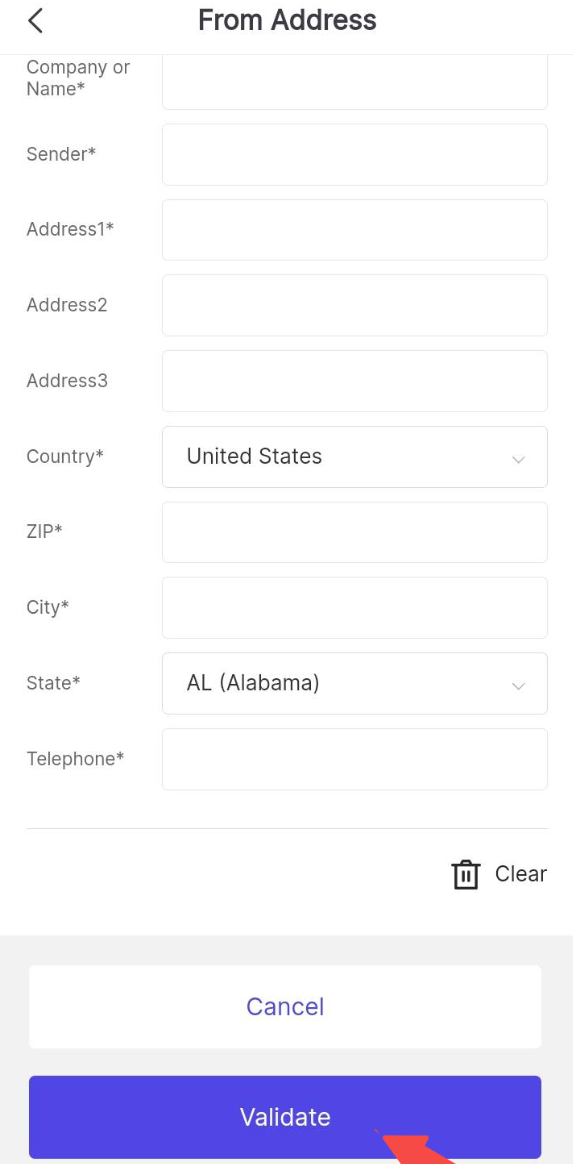
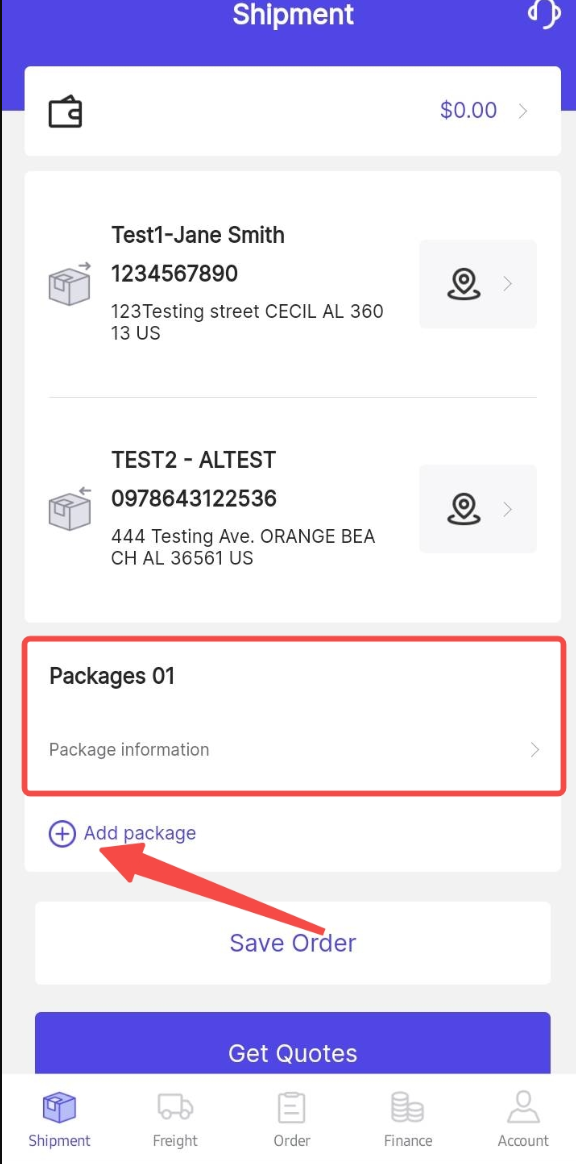
2. On the Shipments tab, put in the Origin address.
Click here for the steps in adding a 'Shipping From' address.
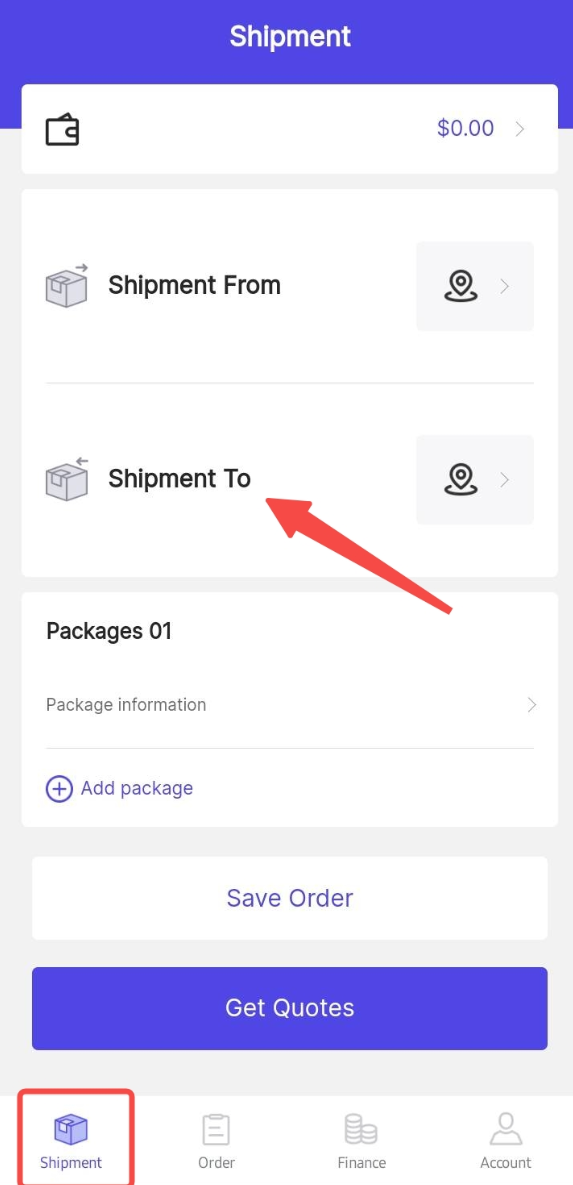
3. On the same tab (Shipments), put in the Destination address.
Click here for the steps in adding a 'Shipping To' address.
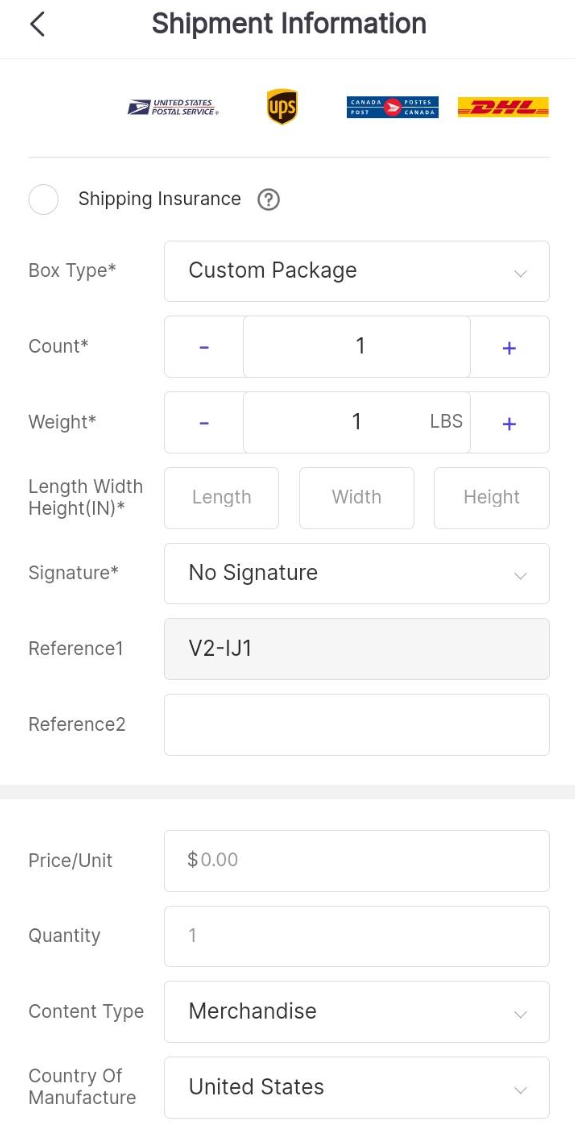
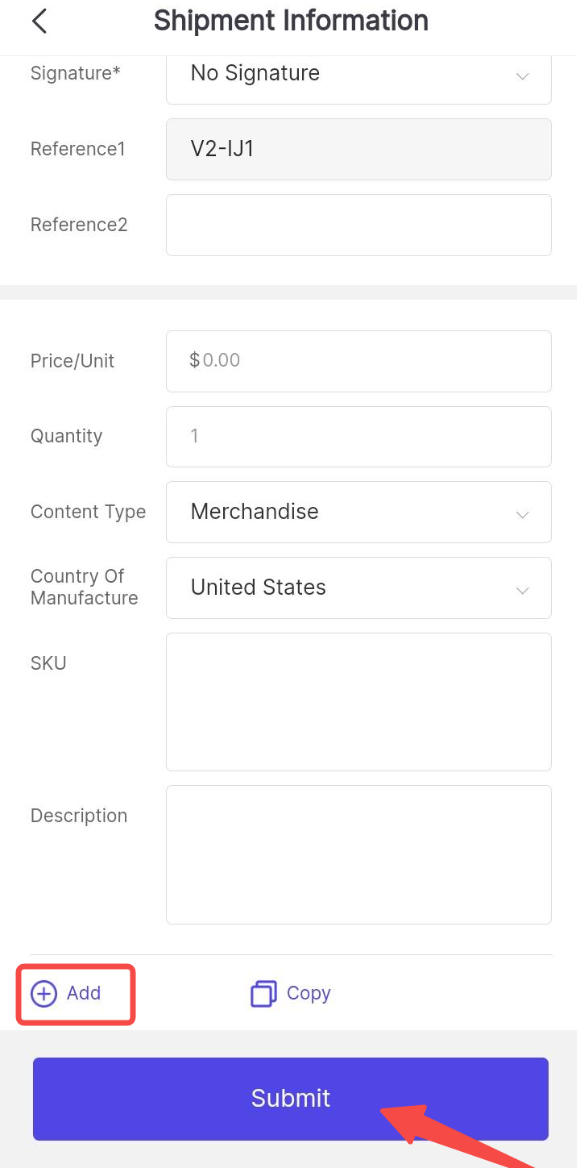
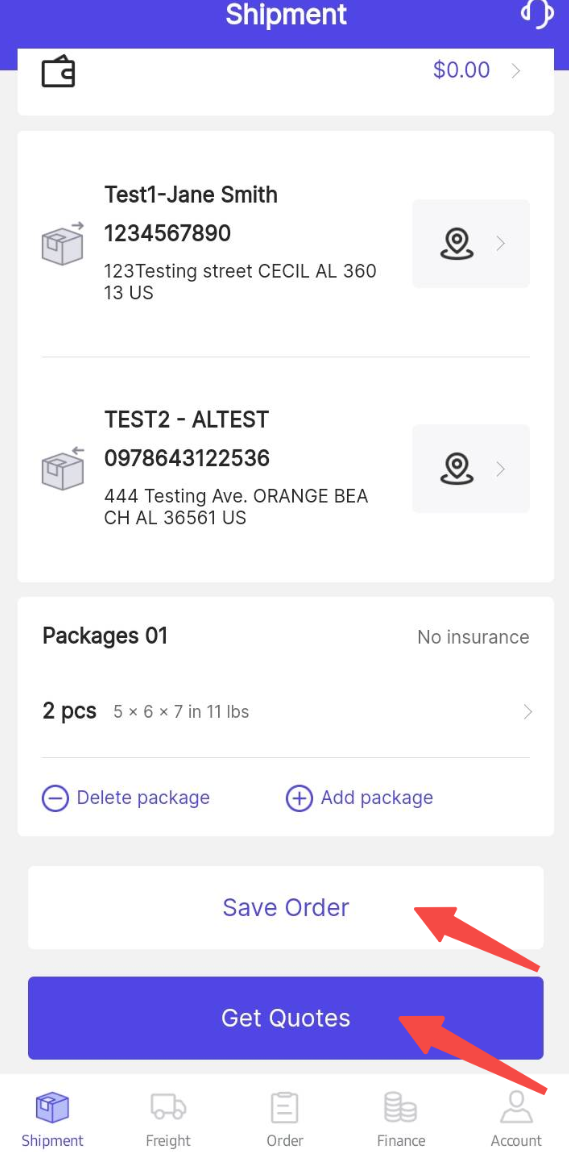
4. Fill in the Package information by clicking on (+) Add Package. You can tap on (+) Add button to add more merchandise descriptions.
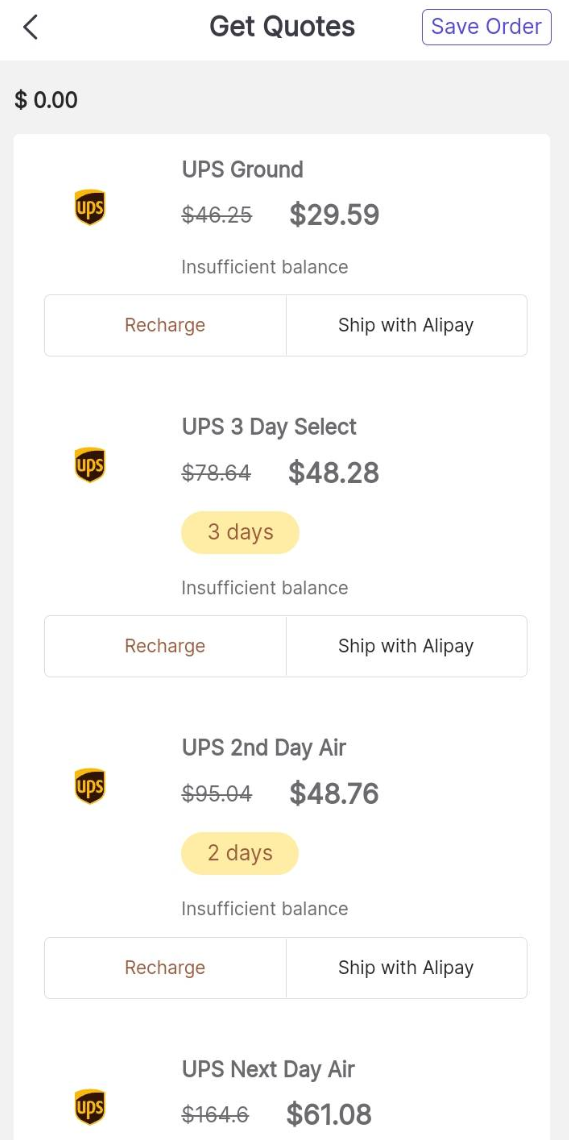
5. After putting the detailed merchandised description. Tap on Save Order then, Get Quotes. Select the best rate suited for your shipment and the carrier you prefer.
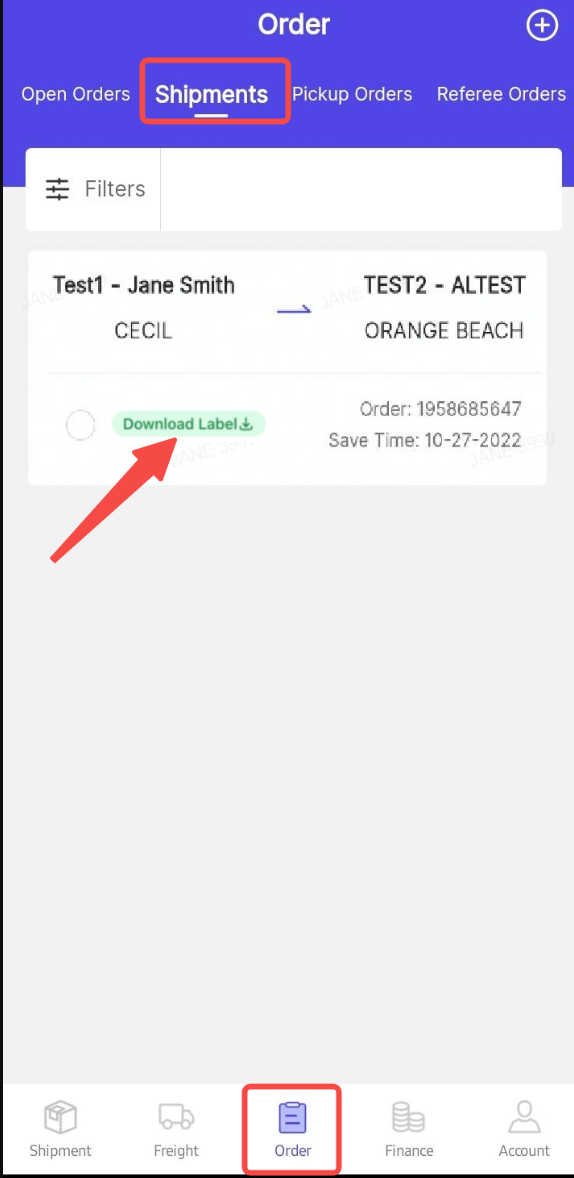
6. Once selected, it will generate a label. Go to the Orders Tab, and look for Shipments.
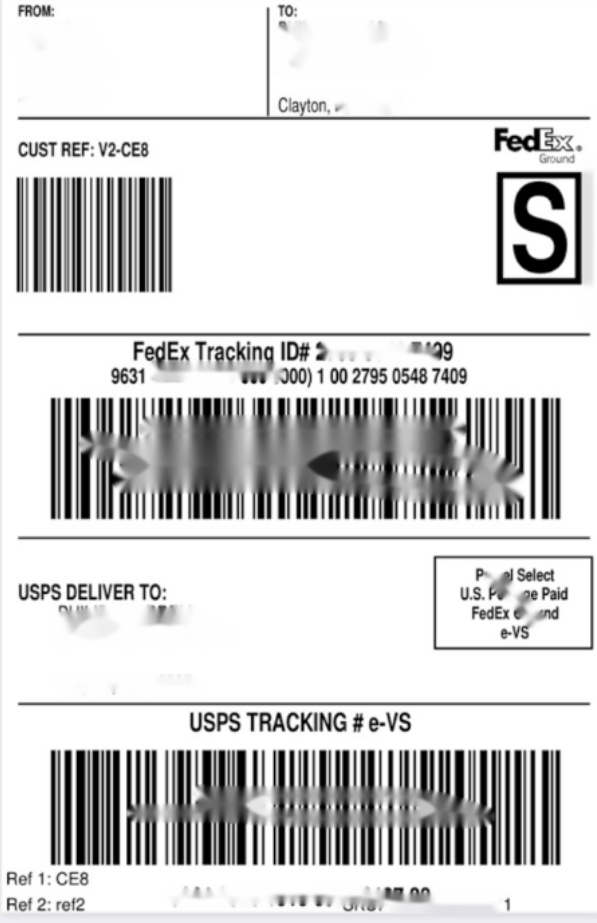
You just need to download it. See the Sample label below:
Related Articles
How to make a Return Label
We understand that there are some cases where packages need to be returned to the Seller or its designated warehouse. We want you to get easy access to this option when necessary. We also designed a Quick Return Label option. There are two (2) ...How to create a Multi-Package Labels
What is multi-package Shipment? A multi-package shipment refers to a single delivery that includes several boxes. It will have a master tracking number and separate tracking numbers for each additional box. Deftship enables you to set individual ...How to create a USPS Manifest File
What is a Manifest file? A manifest is a single-page document with a barcode that carriers can scan to accept all packages into transit without the need to scan each item individually, speeding up the package acceptance process which can save a lot ...How to create a new shipment order
Steps in Creating a New Shipment Order through Desktop 1. Log in to your DeftShip Account. 2. Click on New Shipment. 3. Select the Shipping From address. If the address is not yet, available on the selection. You can add a new address. You can ...How to create a Freight Shipment
You can now get an idea of how much freight shipment is by providing zip codes of 'From and To addresses' and simple merchandise information by going to Quick Quote. If you want to make it more detailed, you can do it through a Detailed Quote where ...